To provide the best experiences, we use technologies like cookies to store and/or access device information. Consenting to these technologies will allow us to process data such as browsing behavior or unique IDs on this site. Not consenting or withdrawing consent, may adversely affect certain features and functions.
The technical storage or access is strictly necessary for the legitimate purpose of enabling the use of a specific service explicitly requested by the subscriber or user, or for the sole purpose of carrying out the transmission of a communication over an electronic communications network.
The technical storage or access is necessary for the legitimate purpose of storing preferences that are not requested by the subscriber or user.
The technical storage or access that is used exclusively for statistical purposes.
The technical storage or access that is used exclusively for anonymous statistical purposes. Without a subpoena, voluntary compliance on the part of your Internet Service Provider, or additional records from a third party, information stored or retrieved for this purpose alone cannot usually be used to identify you.
The technical storage or access is required to create user profiles to send advertising, or to track the user on a website or across several websites for similar marketing purposes.


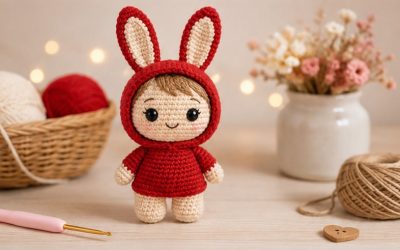
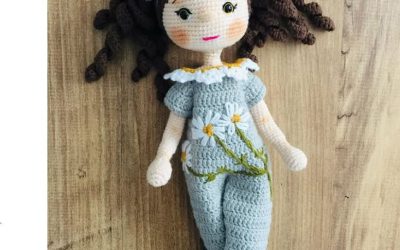
Can’t make one if I can’t print out the instructions.
Hi Carmen,
Thank you for the comment. I introduced this blog protection feature due to the increasing number of content theft from my site. Blog posts are free but cannot be copied. I invite you to browse the blog pages and view directly from there or make print screens and merge them into a Word or PDF file.
Thanks for understanding.
Hi lovely, can’t wait to start this pattern!
Can you tell me what size crochet hook you used please ?
Hi, Emily
Thank you for the message. I used 1.5mm hook, cotton yarn 165m/50g.
Hi! I need a little help with the rounds where im supposed to do dc or hdc in the flo i don’t really get it.
Hi Martina! You must make “dc”.
Hi Carmen I can’t thank you enough for the beautiful pattern I can’t wait to get him started and we’ll post him as soon as I am done with credit to you of course..!!! In excellent explanations and description of the pattern..!!! My mother-in-law has just asked me to make her one I can’t wait …!!thank you thank you thank you
Hi Debra! Thank you for your comment. I am happy that you like the pattern.
Do you have any instruction on how to put the pieces together.
Hi Valerie, thank you for the comment. Unfortunately, there are no assembly instructions in the original pattern. I just translated.
Hi! Thank you for the pattern! Can you help me with lines 20-26 on the head? It says 2 rds of 54. Is that 2 rounds for 20, 2 rounds for 21, 2 rounds for 22 etc??
Hi Julie! Thank you for the comment. This is a transcription error, there are 7 rounds.
Hi, I have a question on round 20 for the head, it says 20-26. 54sc (2 rds). So is it 2 rounds or 6 rounds? because 2 rounds would only be 20 and 21, not 20 -26
Hi Crystal! Thank you for the comment. This is a transcription error, there are 7 rounds.
thank you
Olá, qual tamanho fica essa fofura. Gratidão
Why are there two patterns for the body? Which is the picture?
Hi Shearl! Thank you for the comment!
The body consists of 2 parts: the front part where the front legs will be attached and the back part which is longer. At the end of the pattern you will find a photo showing how these parts are sewn.
I made all the parts. The first body ends with 24 stitches, the second body ends with 50 something stitches. Is the first body suppose to slip in the second. The picture for assembly isn’t clear. Also the finished picture shows the head on a neck but there’s no neck int the pattern. Has anyone made it and can they say what they did?
Dear Shearl,
Assembling the body is done in the following way: The first part of the body is oriented upwards with the 24 stitches that hold the place of the neck. The head is sewn by these.
The second part of the body with 51 stitches at the end is sewn to the side of the first part. Everything is well shown in the assembly photo.
Hey, cute pattern. On body part 1, we join the body colour,without cutting the sweater colour? do a round of blo, then do we just pick the sweater colour back up to do flo dc? Or do we go back & do it with a standing stitch start? Thanks
Hi Laura,
Thank you for the comment.
You return to the free loops (in FLO) and start crocheting with a standing stitch start.
Do I follow the same pattern if I don’t want the sweater?
Hi Bonnie! Thank you for the comment.
Yes, you follow the same pattern, just change the colors.
Hi, love this pattern! One question, what size nose is appropriate to use, if crocheting with 1.5mm hook? Thank you.
Hi,
I didn’t use a plastic nose like in the designer’s original pattern, I embroidered it. The nose is about 2 cm x 2 cm.
Thank you for the comment 🙂
Hi! Please further explain “Fold” for ears. Where folding and 10sc? Thank you!
Fold the ear so that the edges meet, then crochet through both edges (inserting the hook through the two rows); you will have 10 single crochet stitches.